
Unit-, Functional- and Acceptance-Tests for a TYPO3 Extension with GitHub Actions
Back in 2017 at TYPO3 Camp Munich I held a talk about Unit-, Functional- and Acceptance-Tests for a TYPO3 Extension with GitLab CI. I never really used that setup for my Open Source Extensions, since they all are hosted on GitHub. But since november 2019 GitHub Actions are available, so I finally took some time to migrate my GitLab CI Build Pipeline to GitHub Actions. The results of this migration process is available on GitHub and summarized in this blogpost.
To keep things simple, I created a little demo Extension for TYPO3 to make the setup as easy and understandable as possible.
All in all, the results are very satisfying and the build process is really fast without the requirement to use additional docker images (e.g. MySQL or Selenium Standalone). GitHub has really done a great job by providing preconfigured hosted runners with lots of useful tools 👍
The GitHub Repository with all sources and the GitHub Actions workflow is available at https://github.com/derhansen/gha_demo.
During creation of the setup, I ran into some issues, that took me some time to figure out. All issues are easy to resolve and I summarized them in the “Good to know”-section at the end of this article.
TYPO3 demo extension “gha_demo”
The repository includes a very simple TYPO3 extension that basically does nothing special. It has a simple domain model with just one field and a simple plugin that shows all records of the domain model. The extension has the following tests
- Unit Tests for the domain model
- Functional Tests for the repository
- Acceptance Tests (based on codeception) for the plugin output
Before I created the GitHub Actions workflow, I ensured that all tests execute properly in my local development environment.
GitHub-hosted virtual environments
GitHub hosted runners are preconfigured runners that already contain a lot of available software (e.g. composer, PHP in various versions, Google Chrome, Selenium) that can be used to test an application. No need to puzzle around with building or pulling docker images that contain requirements and no waste of build time to install required packages.
For the gha_demo TYPO3 extension I use the Ubuntu 18.04 LTS runner only without any other docker images.
Workflow YAML file
It is very easy to enable GitHub Actions for a repository. You create a directory called .github/workflows and add a YAML file with your workflow configuration that must follow the Workflow Syntax for GitHub Actions .
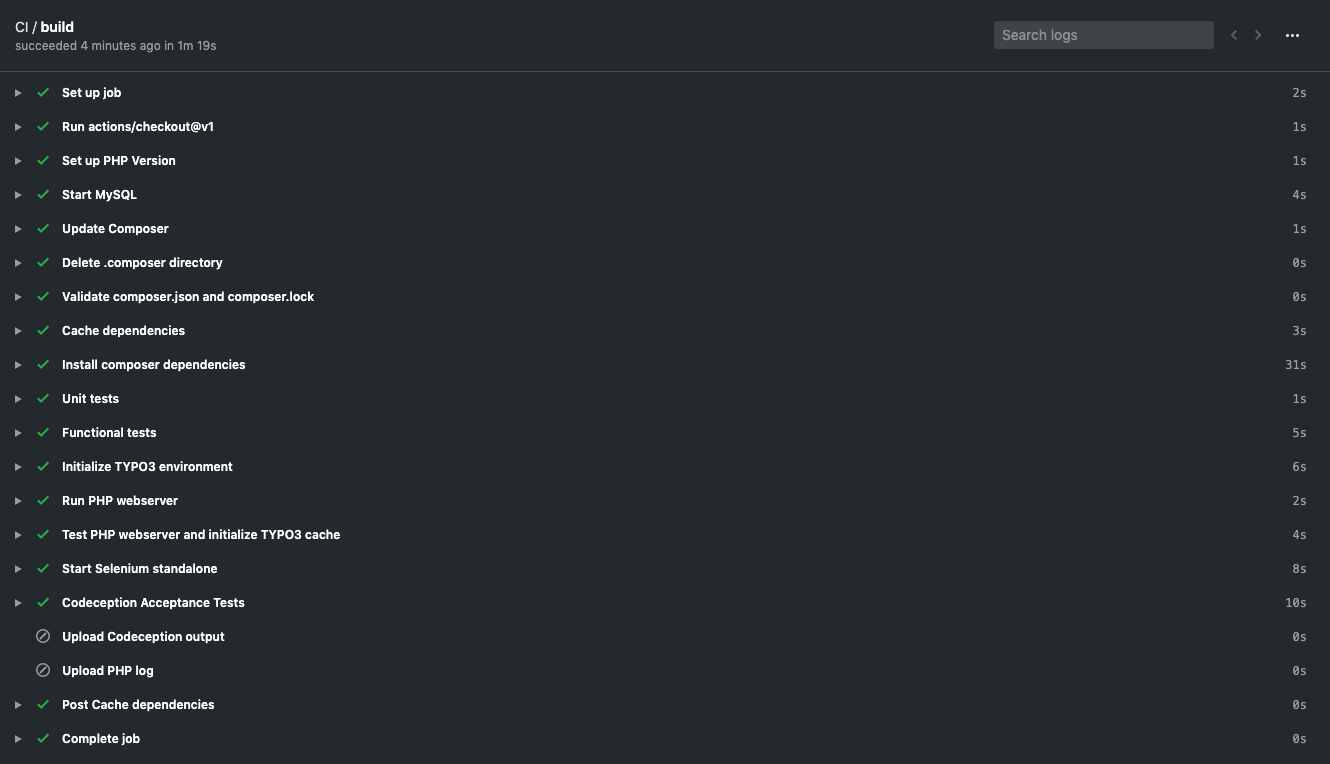
The workflow YAML file I created for this article is (hopefully) self explaining:
https://github.com/derhansen/gha_demo/blob/master/.github/workflows/ci.yml
The workflow uses 3 GitHub actions. The first action “actions/checkout” just checks out the GitHub repository.
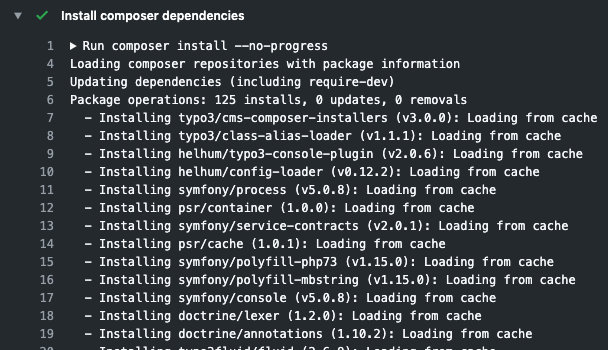
The second action “actions/cache” ensures, that Composer cache files are shared for builds. You just have to configure a unique key for the cache and I choose to use the hash of the composer.json as a key, so every time dependencies change, the cache is rebuilt. To ensure, that the cache is working you should see “loading from cache” in the output of the composer command.
What helps when you want to debug your workflow is to save build artifacts. For this I use the third action ” actions/upload-artifact” which uploads the log of the PHP server and the Codeception output if the build failed.
All other steps in the workflow are based on commands that are executed on the runner (e.g. start MySQL Server, Update Composer, …).
You may note, that the workflow contains 2 “sleep” commands. Both are required so previous commands have enough time to finish execution (start PHP Server and start Selenium).
Another thing you may note is, that I added many TYPO3 packages to the require-dev section of my composer.json file. This is not a requirement and can be moved to an additional build step (e.g. composer require typo3/cms-filelist ….).
Acceptance Tests with Codeception
In order to execute the Codeception Acceptance Tests, it is required to setup a fully working TYPO3 website including a preconfigured database dump with e.g. pages and records to test. For the Acceptance Tests I included the following files/folders in Tests/Acceptance/_data
-
config/
TYPO3 Sites configuration -
typo3conf/LocalConfiguration.php
Preconfigured LocalConfiguration PHP that matches the environment and settings (e.g. DB Credentials) for GitHub Actions -
typo3.sql
Full Database dump of my local test TYPO3 website
To separate between Acceptance Test environments (local and GitHub) there are configuration settings for both in _ Tests/Acceptance/_env_
At this point I would like to thank Daniel Siepmann for sharing his GitLab CI configuration about Acceptance Tests. I adapted some parts of his examples to my current setup.
Update 29.05.2020: If you want to test an extension against multiple TYPO3 versions, you can use a build matrix as shown in this example from Sebastian Fischer.
Good to know
#1 - Composer dependencies are not cached during builds
Update 15.05.2020: Not required any more, since the issue is fixed.
Due to a misconfiguration in the Ubuntu 18.04 runner (that has already been fixed), the .composer directory is owned by root:root with 775 rights. This makes it impossible for the runner user to write into that directory. To fix this, make sure to remove the the directory recursive as shown below in a build step before composer is executed.
- name: Delete .composer directory
  run: |
    sudo rm -rf ~/.composer
#2 - PHP server with “php -S” is obviously not starting
I used php -S 0.0.0.0:8888 -t .Build/public/ &> php.log.txt & to start a PHP server that serves my application for
Acceptance Tests. Somehow the acceptance tests step was not able to connect to the given port and always showed “Failed
to connect to x.x.x.x port 8888: Connection refused”
To solve this issue, I forced the workflow to stop for 2 seconds (just added sleep 2; right after the PHP -S line) so
PHP has enough time to server the application.
#3 - MySQL credentials not accepted / MySQL “Connection refused”
Setting up a build step that uses MySQL I ran into problems connecting to the MySQL server that comes with the default Ubuntu 18.04 runner. The solution to this problem was really simple, since you just have to start the MySQL service.
- name: Start MySQL
  run: sudo /etc/init.d/mysql start
The default credentials for the MySQL are root:root